This article applies to:
- Trustwave MailMarshal (SEG)
- Note for MailMarshal (SEG) 10.X additional steps are required for same-server installation and some restrictions may apply
- Microsoft Exchange Server 2013 and 2016
Question:
- How to configure Trustwave MailMarshal (SEG) to forward mail to Microsoft Exchange Server
- How to configure Microsoft Exchange Server 2013 or 2016 to forward and receive email from Trustwave MailMarshal (SEG)
Procedure:
To configure MailMarshal (SEG) as gateway with Microsoft Exchange Server 2013 or 2016 as the internal email server, follow the steps in this article.
- MailMarshal (SEG) 10.X interfaces differ, but the information required is the same.
Please read through and understand the details, particularly about port assignments, before starting.
NOTES:
- It is possible to install Trustwave SEG with Exchange Server on the same machine and this article covers this scenario. However, you should carefully consider the resources required for same-server installation.
- For installations of significant size, Trustwave recommends you install SEG separately. This article also covers installation of SEG on a separate machine with email flow between the servers.
- The MailMarshal (SEG) 10.X Array Manager includes a default HTTPS website that conflicts with Exchange. To install SEG on the same server as Exchange you must change the binding of the SEG Management Console. The Exchange ECP and OWA websites will not run until you make this change. MialMarshal (SEG) 10.0.1 and above installers detect conflicts and prompt you to select a different port.
- For additional steps to allow the co-existence of MailMarshal (SEG) 10.X and Exchange websites, see article Q12671.
- Port 25 assignment: When installing Trustwave SEG and Exchange server on the same computer, you will most likely find that both attempt to use port 25 for SMTP email. Generally you should allow SEG to use this port (to accept email from external locations) and configure Exchange to use another port. Port 97 is usually available for this purpose.
- This article describes the simplest un-authenticated configuration for incoming email. Many other security options are available.
- For example, you may want to limit access by IP address, and/or use Basic authentication over TLS to control access.
- Two procedures are given for configuring SEG delivery. The first is for the configuration of SEG if it has not already been installed. The second can be used to change the settings after SEG is already installed.
Configuring SEG Delivery During Initial Installation
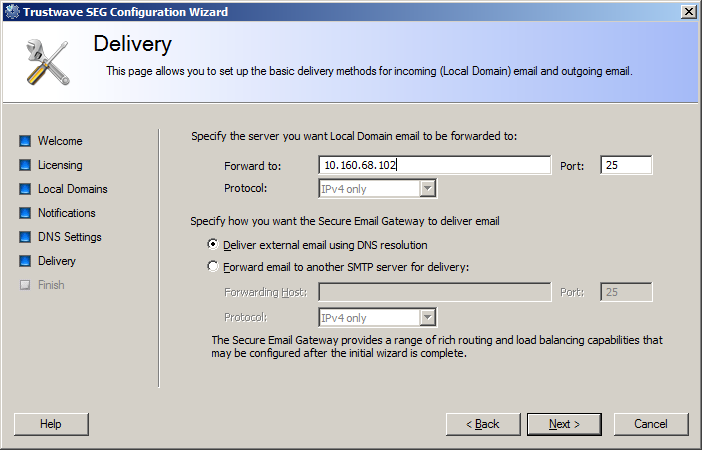
- In the Configuration Wizard, on the Delivery window enter the IP Address and Port of your Microsoft Exchange Server in the Local Domain email should be forwarded to the following mail server IP/port field.
-
- If Exchange and SEG are on the same server, be sure to configure and use a unique port for Exchange, as mentioned above.
- Select SEG will deliver external email itself using DNS resolution. See below.
Configuring SEG Delivery After Installation:
- In the SEG Configurator or Management Console, expand Server and Array Configuration and select Routes.
- Edit the Default Routing Table.
- Edit the Local Domain you would like to forward to Microsoft Exchange Server.
- On the Domain Routing window double click the IP Address you are currently using to route mail.
- On the Route Entry Properties window, change the IP address to the IP Address of your Microsoft Exchange Server installation.
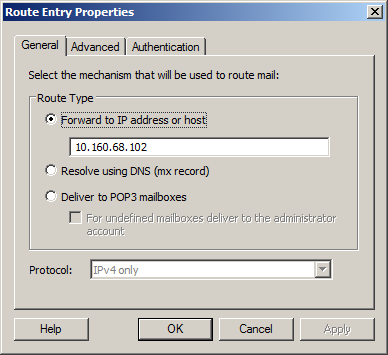
- On the Advanced tab of Route Entry Properties, make any changes to the Port and Priority for the route. For more information see Help.
- If Exchange and SEG are on the same server, be sure to configure and use a unique port for Exchange. See the section about configuring Exchange below.
- You can also configure SEG to make authenticated connections to Exchange. See the Authentication tab of Route Entry Properties. Details are beyond the scope of this article.
- Save the changes and commit the configuration.
Configuring SEG Relaying Permissions:
In most cases the above steps will also allow Exchange Server to relay outgoing email through SEG. However, if you find that relaying from the Exchange Server is denied by SEG, you can allow relaying using the following steps:
- In the SEG Configurator, expand Server and Array Configuration and select Relaying.
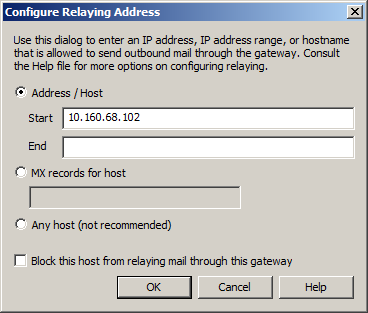
- Edit the Default Relay Table.
- Add an entry with the IP Address of the Microsoft Exchange Server you want to allow to forward email to SEG.
- Save the changes and commit the configuration.
Configuring Exchange Server
Follow the steps below to configure Microsoft Exchange Server to receive email from SEG:
- In the Exchange Admin Center website, select mail flow from the left menu, and then select receive connectors from the top menu.
- From the Select server menu, select the server you want to use to receive incoming mail from SEG.
- You may be able to use an existing receive connector such as the "Default Frontend" connector, or you may need to create a new connector.
- If you want to use an existing connector, double-click to edit it, and verify the network and permission settings are as described below.
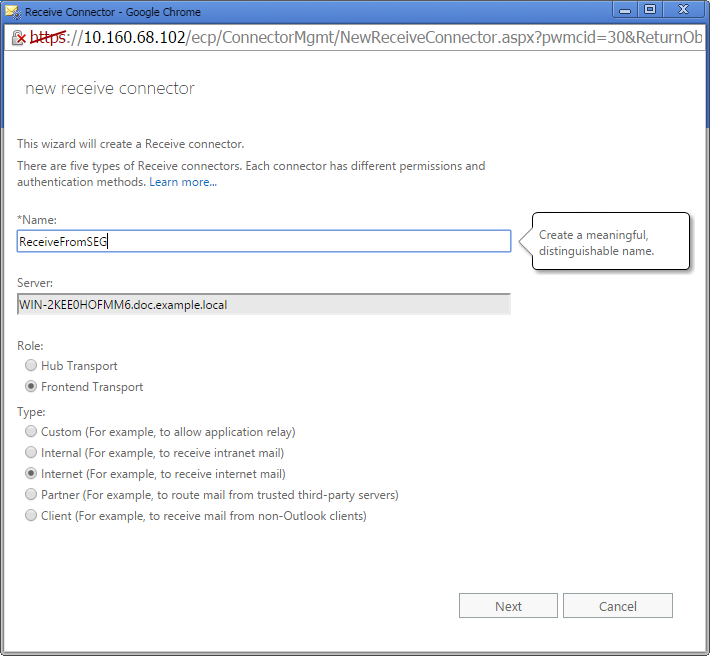
- If you want to create a new connector, click + to create a new receive connector.
- Enter a Name for the connector.
- Select Role: Frontend Transport
- Select Type: Internet
- Note: This setting enables connections from all locations. If you want to limit connections by IP address, after creating the connector edit the setting on the Scoping tab.
- On the Network adapter bindings window, ensure the IP addresses field includes All Available IPv4. (You can also use IPv6 with current SEG versions.)
- For the Port:
- If Exchange and SEG are on the same server, DO NOT use port 25. Instead, edit the line and select an unused port. Port 97 is often available.
- If Exchange and SEG are on separate servers, generally you should use port 25.
- Click Finish.
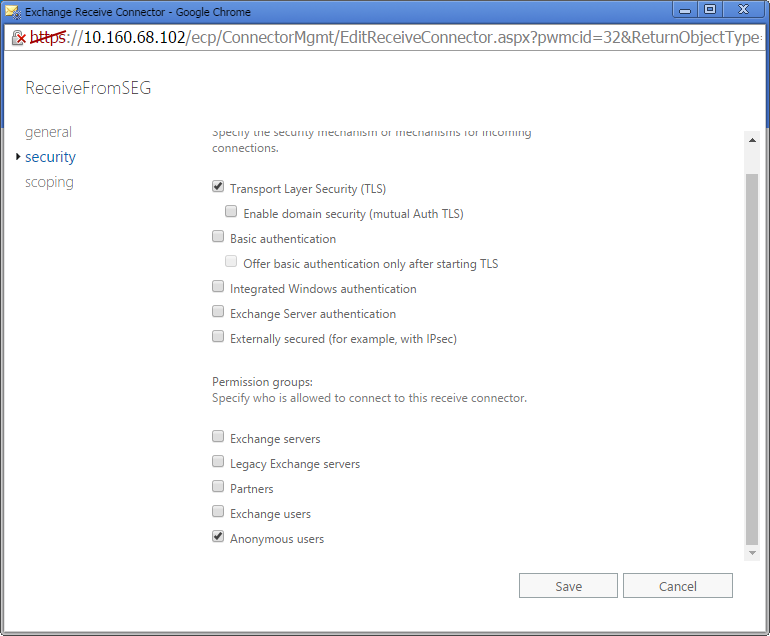
- Verify anonymous access:
- Double click the name of the new connector.
- On the Security tab, ensure the Anonymous users box is checked. Click Save.
- You can also enable or require authenticated connections from SEG with other options on the Security tab. Details are beyond the scope of this article.
Follow the steps below to forward mail from Microsoft Exchange Server to SEG:
- In the Exchange Admin Center website, select mail flow from the left menu, and then select send connectors from the top menu.
- Click + to create a new send connector.
- A Send Connector may already be configured. If you want to use the existing connector, verify the network and security settings as described below.
- Enter a Name for the connector and select Custom from the menu. Click Next.
- On the Network Settings window, select Route mail through the following smart hosts. Click Add and enter the IP Address where SEG accepts email. Click Save and then Next.
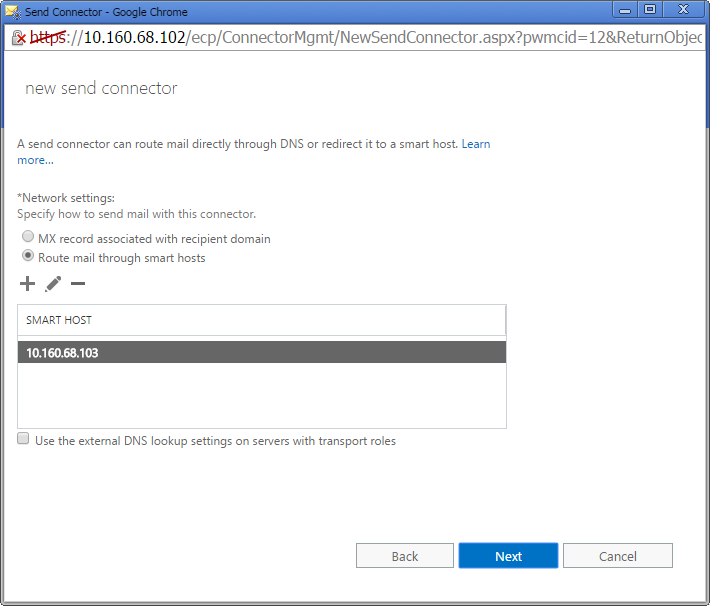
- For array installations, use the address of an email processing node or the external IP of a load balancer; for single servers, the address of the server.
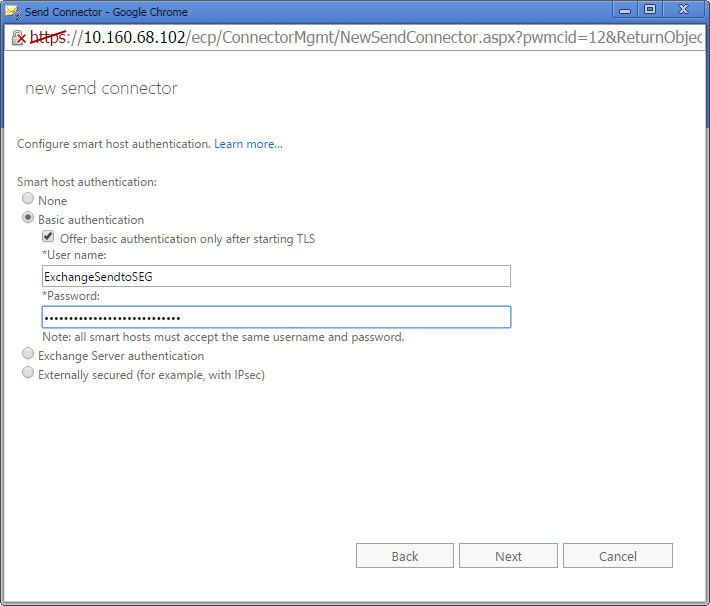
- Select an authentication method, or "none" if you do not want to require authentication. All current SEG versions support Basic authentication and Basic over TLS.
- Before enabling authentication here, ensure you have set up the required account (and TLS if desired) in SEG.
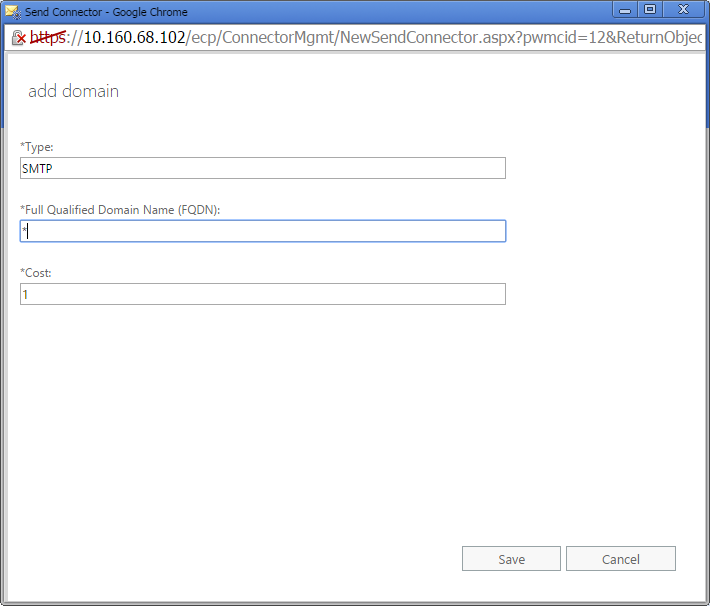
- On the Address space window, click + to add an address space. In the FQDN field, enter * to signify all domains. Click OK and then click Next.
- On the Source server window, click + to add one or more servers. Generally add all Mailbox servers in the Exchange installation. Click OK and then click Next.
- Click Finish to create the connector.
Notes:
- For Exchange 2007/2010, see Q11972: Configuring Trustwave MailMarshal (SEG) to forward mail to Microsoft Exchange Server 2010 or 2007.
To contact Trustwave about this article or to request support:
Related Articles
Add Your Comments
Comment submission is disabled for anonymous
users.
Please send feedback to Trustwave Technical Support or the Webmaster.
|
|
Article ID: 20645
Last Modified: 5/1/2020
Type: HOWTO
Article not rated yet.
Article has been viewed 10,617 times.
|